Do you know how to make a mixing bowl cover? If you love DIY arts and crafts and browsing through Pinterest, you’ve probably seen colorful and beautiful DIY mixing bowl covers that you can make in your home with everyday materials such as scissors, cloth, and a needle and thread.
If you want to make your work a little easier or more professional-looking, you can use a sewing machine but if you don’t have it, you can just as easily make a mixing bowl cover by hand. Here is an easy guide on how to make a mixing bowl cover from scratch!
Why Do I Need a Mixing Bowl Cover?
First, why do you need a mixing bowl cover? Here are three reasons:
Keeps your Mixing Bowl Clean in Storage
No one likes taking out a mixing bowl from storage and seeing a lot of dust, debris, and the occasional insect scurrying around inside. What’s worse, sometimes you can’t even see the dirty part of your mixing bowl, imagine if a rat had walked inside your uncovered bowl and tracked germs on the surface!
Having a cover on your mixing bowl when you place it in storage ensures that you will have a clean bowl ready for use anytime you need it.
Keeps Resting Dough Clean
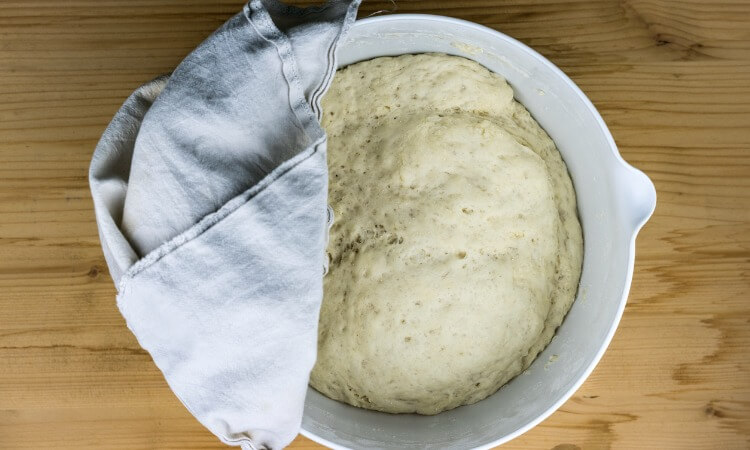
If you love baking, there are many recipes that call for resting your dough for a period before using it, particularly for bread recipes. Resting your dough allows the gluten in the bread to relax, and it also allows the yeast to aerate your dough to make it light and fluffy.
DIY fabric bowl covers help protect the resting dough from dust and other contaminants that you don’t want in your food. What’s more, a cloth cover also allows the dough to breathe so that the moisture won’t get trapped inside with the dough.
Protects Food for Outdoor Picnics
Finally, mixing bowl covers are useful to transform your bowl into a makeshift storage container for outdoor picnics! You won’t need to transfer your food and dirty up another container; simply place the cover on your mixing bowl and it’s ready.
DIY Mixing Bowl Covers vs. Commercial Kitchen Bowl Covers
Many commercial mixing bowls, such as those made by popular companies such as KitchenAid and Cuisinart, often include a mixing bowl cover with their products. However, if you have more than one mixing bowl or you bought yours separately from a lesser-known brand, there might not be a cover with your mixing bowl.
DIY Mixing Bowl Covers Pros and Cons
If you don’t have a cover that came with your mixing bowl, you can make your own at home. Here are the pros and cons of making your own mixing bowl cover at home.
Pros
- You can choose your own design
- You can choose your own material
- Cheap to make
- Numerous fabric bowl cover tutorials online
Cons
- Takes practice to perfect
- You need basic sewing skills especially if you are making fitted covers
Commercial Kitchen Bowl Covers Pros and Cons
If you have a mixing bowl from popular brands, chances are that you will be able to buy a cover. Here are the pros and cons of just buying a ready-made mixing bowl cover.
Pros
- Better quality materials
- Will fit your bowl exactly
Cons
- More expensive
- Not all mixing bowls have ready-made covers on the market
A Step-by-Step Guide on How to Make a Mixing Bowl Cover
If you have decided that you want to make your own mixing bowl cover, here’s a short guide as well as a list of the materials that you need on how to make a bowl cover.
The Materials
If you have decided that you want to make your own mixing bowl cover, here’s a short guide as well as a list of the materials that you need on how to make a bowl cover.
- ½ yard of your preferred fabric or cloth. If you don’t know what to use, cotton twill is a good choice because it is cheap, easy to use, and comes in a wide variety of designs
- Washable pencil or marker
- Cotton thread in the same color as the fabric
- Sewing machine
- Pinking shears
- Safety pins
- Ruler
- ¼ inch elastic band
Note: This will make around 2 mixing bowl covers. You can adjust the amount of fabric to produce as many covers as you need.
The Steps
- Measure the circumference of the mixing bowl mouth by placing it upside down on top of your fabric. Mark out 1.5 inches from the rim using the ruler and trace around the whole bowl with your pencil.
- Cut out the marked line and remove the excess fabric.
- Sew the sides of the circle to prevent fraying. If you have a sewing machine, choose the medium-sized zig-zag pattern.
- Measure the elastic bang by wrapping it around the body of your mixing bowl. It should be snug enough that the band holds in place but not pulled tautly.
- Pin the elastic to the underside of your fabric circle, right over the sewn edge.
- Fold the circle in half and pin the middle to the other side of the circle.
- Using the zig-zag pattern on your sewing machine, feed the cloth through the needle point and stitch the elastic to your fabric. Stop occasionally to check whether the elastic band is properly being stitched onto the circle. Continue until the whole elastic band has been sewed on the circle.
- Place the cover on your mixing bowl to see if there are any minor adjustments that you need to make.
If you don’t have a sewing machine, you can still sew the fabric and the elastic band by hand, but it will be more tedious, and it will take longer for you to finish.
Conclusion
There you go, now you know how to make a mixing bowl cover from scratch! You can have beautiful and customized covers for all your mixing bowls to keep them clean and dry in storage or to protect your dough. You can even make some for your friends and give them away as gifts. Mixing bowl covers are a must-have for any serious home baker! Get more tips about mixing bowls.
